Monday, October 11, 2010

New Favorite Cake

Let’s talk cake today, shall we?

Hands down, chocolate is my favorite flavor in all the world, and chocolate cake with chocolate frosting is the best snack or dessert (or breakfast!)anytime, anyplace.

There is much to be said for lemon, though. I love a sweet, tangy lemon cake with lemon icing. Yum – my mouth is watering just because I typed that last sentence. Others that I like are Italian Cream Cake (smooth and creamy and vanilla-y), Carrot Cake (a little spicy, nutty, and cream cheese frosting – yum).

A few weeks ago I found myself planning a few birthday cakes. The first, Brad’s, was easy – it had to be chocolate for his first birthday. 10-02-10 155We had buttercream frosting and fondant balls for decorations. It was festive, cute, and tasty.

The second, to celebrate my BIL Randy’s 50th birthday was easy-peasy. He got apple pies. I confess that I did bake those pies, but Marie Callander actually made them. They, too, were delicious.

The third cake was more of a challenge. I wanted something a little sophisticated for my FIL’s  birthday, yet it needed to be easy and simple. I asked for ideas and was told “just not chocolate”. That was covered by Brad’s cake, so not a problem. What to make for a man from the South celebrating his 75th?  There were a few more suggestions, but nothing that sounded “right”. On my way home from work just a few days before the party, it came to me – Maple Walnut! It would be autumnal and Southern and grown-up. Just what I was looking for.

As soon as I got home, I Googled for recipes, and when I found this blog with a recipe for cake with maple-flavored icing and walnuts decorating the sides, I knew the quest was over.

I made a 10” double layer plain white cake (yes, from a mix). The maple frosting mixed up easily. Oh, it was sweet and maple-y and so good!

small maple cake

Pressing the walnuts to the sides wasn’t quite so simple,but a little star border around the bottom took care of the “messies” I made. Next time I will chop the nuts a little finer and coat the top, instead.

There was none of this cake left after the birthday party and I got lots of compliments.

I’m including the frosting recipe as it was printed on that blog, but if you want the entire recipe for the cake and all, go visit The Well-Seasoned Cook.

American Buttercream Frosting (Maple)
[This is a standard recipe, using all butter and no trans-fat shortening. If you are not fond of the metallic gritty sweetness of confectioners sugar, you can use glazing sugar, a powdered sugar without cornstarch. King Arthur carries it.]
Ingredients
½ pound butter, softened to room temperature
1 pound confectioners sugar (or more)
¼ cup milk (or more)
1 Tablespoon natural maple extract (much more highly concentrated than maple syrup)
Method
In a large bowl, beat butter until creamy and fluffy. Add sugar one cup at a
time, beating well between additions. Keep beating until all the sugar is absorbed. Add extract and milk, and resume beating until frosting is smooth
and light. Frosting consistency is a matter of taste. You can easily add more sugar to thicken. You can also stretch your ingredients by adding more sugar and milk incrementally until you have doubled the volume. This is especially useful if you have a large cake to frost and don't want to increase an already high fat content. Keep frosting tightly covered until ready to use to prevent sugar crust. Buttercream does not have to be refrigerated, but should be kept in a cool place so it doesn't melt.
After filling and decorating the assembled layers, gently press approximately 1 1/2 cups of chopped walnuts into the sides of cake. Cake
will develop a natural sugar crust while standing; this is perfectly harmless and adds to its character. Cover with a large inverted plastic bowl to keep it fresh.

Sunday, September 5, 2010

Bring the Heat

As usual, the jalapeno plants have produced a plethora of peppers again this summer, and they’re not done yet. We’ve pickled them, stuffed them, frozen them, and last week I tried a new-to-me recipe for jalapeno hot sauce. The recipe was shared on a Yahoo email list I belong to and I cooked some up within the hour of reading about it.

jalapeno hot sauce

(Click on recipe title to see original.)

Jalapeno Hot Sauce

Prep Time: 20 Minutes

Cook Time: 25 Minutes

Ready In: 45 Minutes

Servings: 16

"Jalapenos, garlic and onion sautéed and pureed into fresh homemade hot sauce."

Ingredients:

1 teaspoon vegetable oil

20 fresh jalapeno peppers, sliced

3 cloves garlic, minced

1/2 cup minced onion

3/4 teaspoon salt

2 cups water

1 cup distilled white vinegar (I followed a suggestion of using just 2/3 cup)

Directions:

1. In a medium glass or enamel lined sauce pan over high heat, combine oil, peppers, garlic, onion and salt; sauté for 4 minutes. Add the water and cook for 20 minutes, stirring often. Remove from heat and allow mixture to cool to room temperature.

2. Transfer the mixture to a food processor and puree until smooth. With the processor running, slowly add the vinegar.

3. Pour into a sterilized jar with a tight lid. This sauce will keep for 6 months when stored in the refrigerator.

I got five 4 oz. jars and one half-pint jar from this recipe. There was a little bit leftover after filling the jars, and Jess scooped it up with some tortilla chips. She said it was “a bowl of deliciousness”.

So far we’ve just dipped chips into the jar and eaten it that way. I plan to make some enchiladas this week and will use this as a condiment.

Tuesday, August 24, 2010

A New Homemade Pizza

We have very limited choices for carry-out pizza around here, and while we usually enjoy not having to cook, we really, really like homemade pizza. This is a recipe I found a few weeks ago on a blog, and I thought it sounded  pretty delicious, and it was. Oh, it was…

Of course, I made a couple of changes, which I’ll note at the end of the recipe. Try this one. I mean it.

(Click on the recipe title to see the blog.)

pizza 004

Thin-Crust Chicken Bacon Artichoke Pizza

Thin crispy crust with a light garlic sauce, topped with grilled chicken, turkey bacon, mozzarella, baby spinach, marinated artichokes, and feta cheese

Yield:

8 large slices

Ingredients:

Crust Ingredients:

1/2 cup warm water (115 degrees)
1/2 teaspoon salt
1 1/3 cups all-purpose or bread flour
1 teaspoon dry yeast

Garlic Sauce Ingredients:

1/4 cup light or fat free Italian salad dressing
1/2 teaspoon granulated garlic or garlic powder
1/2 teaspoon salt
dash black pepper

Toppings:

1/2 cup cubed or thinly sliced grilled or rotisserie chicken breast meat
1 cup (loosely measured) baby spinach leaves
1/3 to 1/2 cup marinated artichoke hearts, blotted dry and cut into bite-size (small) pieces
8 ounces (2 cups) shredded mozzarella cheese
2-3 slices turkey bacon ("fully cooked"), chopped into small pieces
1/4 cup crumbled feta cheese
Green onion slices, optional
Parmesan cheese, for serving (optional)

Instructions:

1. To make crust, place warm water and salt into a medium mixing bowl. Add a cup of the flour and the yeast, and stir. Add remaining flour (1/3 cup) and stir or knead into a sticky dough, adding additional water if needed. Allow dough to rest, covered with a clean towel, for at least 10 minutes but up to 30-45 minutes.

If you have a bread machine, this first step can be done by putting all crust ingredients into the machine and using the dough cycle to knead for 10-15 minutes, until a soft, sticky dough is formed. Stop the machine and allow dough to rest for at least 10 minutes, or up to 30-45 minutes.

2. Liberally butter a 16-inch round pizza pan, and then with your clean buttery hands, spread dough thinly over the pan. Be gentle and have patience, as this does make a perfectly thin crust!

3. Combine the garlic sauce ingredients and spread the sauce over the dough/crust and allow to rest for 15 minutes or longer (up to 45 minutes).

4. Sprinkle toppings evenly over sauce in order listed.

5. Bake pizza in a pre-heated 450-degree oven for 10 minutes or until top is browned and bubbly, and crust is slightly browned on the bottom. Watch carefully to avoid burning! :)

Cut pizza into 8 slices and serve hot, with parmesan cheese if desired. Enjoy!*My Notes: our crust was not crispy, and I know why. I did not ‘liberally butter’ the pizza pan and use my buttery hands to spread the crust. Next time I’ll use the stone and see if I can stay away from the butter, yet get that crispy crust.

I added sautéed mushrooms. Everything is better with mushrooms. Yes it is!

Only half the pizza got spinach. Some things I just cannot get him to like…

Surprisingly, I had no feta cheese in the house. We didn’t miss it, but it would add a little touch of tang.

I used sliced fresh mozzarella instead of shredded.

No green onions, but next time I think I’ll add thinly sliced red onion.

After she took one bite, Jessica told me, “I keep telling you, we could cater!”  Hmmm… we?


Monday, August 23, 2010

Muffin Tin Monday

Muffin Tin Mom

I discovered Muffin Tin Monday (MTM) a long time ago, and think this is such a fun way for kids to have a special meal or snack. A couple of years ago I put one together for Taylor when she was staying here, but am just coming back to it again now with Bradley. Take a peek at Muffin Tin Mom’s blog and see what the other participants are putting together for fun meals with their kids. I’m so excited to find fun picks and things for when Bradley gets a bit older.

Speaking of Bradley, he is eating most all table food now (except for things he cannot have until he’s one or two for allergy reasons), so the other day I put together this fun plate for his lunch.

The theme for this week’s meals was “ABC” so instead of a muffin tin, I used this sweet compartmentalized ABC plate. (I picked it up at Target at the beginning of summer when it was on clearance for 75 cents.)

08-22-10 004

I used white cupcake papers to hold the food: avocadoes for “A”, blueberries for “B”, and cheese toast for “C”.

08-22-10 010

He’d been sick and wasn’t eating great quantities, so this looks pretty chintzy on food, but it was fine for him that day. In fact, he didn’t eat the blueberries until later. Of course, at 10 1/2 months old, there is no way he was leaving this plate and cupcake papers on his high chair tray and eating from it. To pre-empt the mess that would have been him tossing the plate, I showed it to him, then we dumped the avocado and the cheese toast on his tray so he could feed himself.

08-22-10 017

I hope this becomes a fun tradition he and I have together, and as he gets older he can help plan and prepare the MTM. I’d have loved to have done this on home visits when I was a family educator for Head Start. What a great way to get kids and parents together in the kitchen to create nutritious meals, and possibly try new foods!

signature

Tuesday, August 10, 2010

Here Fishy, Fishy, Fishy!

Randy went fishing in South Dakota last month and brought home some walleye. This is a very flavorful and firm white fish and I was quite happy when he gave me a package of fillets to take home.

I did some recipe searching so we could make the most of our walleye, but pretty much it was just breading and frying, so that’s what we did. I first dredged the fillets in flour, then dipped in beaten egg, then covered them with panko crumbs. Greg fried them in some canola oil in a cast iron skillet and they came out golden brown and crispy on the outside, juicy and flavorful on the inside.

walleye (1) copy

To go along with our delicious fish, we had zucchini fritters and sweet corn. I made two simple sauces, just mayonnaise and ketchup mixed together for one, and mayo with sweet pickle relish for the second.

I did email Randy after we finished eating and told him that if he should have any extra walleye hanging around, to please think of us!

Sunday, August 8, 2010

Wrapping the Salmon

Last week when Greg grilled our salmon for supper, I gave him an extra piece so I’d have leftovers. There was an idea in a Martha magazine for a wrap using salmon mixed with cream cheese and cilantro.

I didn’t have any cilantro, but was able to run out to the garden and snip some dill instead. Chopped that up, crumbled up the salmon, and mixed both with part of a brick of low-fat cream cheese.

After spreading the mixture onto a flour tortilla, I added thin-sliced tomato and avocado for a yummy lunch wrap.

salmon wrap copy

I had enough mixture left for three more tortillas. Those were sliced into rounds for finger food at another lunch. Bradley loved them!

Thursday, June 10, 2010

Mediterranean Herb Paste

Supper tonight was a small pork loin on the grill. Greg does lots of rubs and we have a small selection of bbq sauces that we use often with pork, but I wanted something a little different to go with the brown & wild rice we were also having. A quick perusal of my recipe files found this herb paste that I think I got from the Herb Companion web site last summer.

Since we’re somewhat into our gardening season finally, I do have these fresh herbs growing in the back yard. As usual, it was a kick to go outside and cut the herbs as I needed them.

I had a 1.12 lb pork loin to cook on the grill. Just covered the top of the loin with some of this paste, then Greg grilled it for about 25 minutes over medium indirect heat.

Mediterranean Herb Paste
By Pat Crocker
Makes 3/4 cup
Make and use this in several different dishes in a week. It can form the
basis for a vinaigrette dressing, soup, dips, spreads and even be used as a
flavoring for savory muffins and scones.
. 10 garlic cloves
. ½ cup fresh sage leaves, chopped
. ½ cup fresh thyme leaves
. ¼ cup fresh rosemary leaves, snipped
. 2 tablespoons Dijon mustard
. 1 tablespoon sea salt
. ¼ cup olive oil
. 1 tablespoon tarragon or white wine vinegar
1. Pulse garlic in food processor 3 or 4 times or until garlic is finely
chopped. Add sage, thyme and rosemary; pulse 3 or 4 times until finely
chopped. Add mustard and salt; pulse until blended.
2. Gradually add 3 tablespoons oil, processing until blended. Add vinegar
and remaining olive oil and process until blended.

This smells amazing! It was good on the loin – I think I would marinate the meat with it overnight next time so more of the flavor is absorbed.

There is about half of the recipe left, so I thought I’d mix it with some fresh mozzarella and slice some tomatoes for a salad. I’ll let you know how that goes…

Monday, May 31, 2010

Rhubarb Blueberry Jam

I was gifted quite a bit of rhubarb recently, enough to make a few desserts and a double batch of this delicious jam. My son, Nick, just loves it, and he’s the pickiest eater we have.

jam 004

Since it’s a freezer jam, there’s no pectin or hot water bath. Just follow the directions for cooking, pour into the jars, put on a lid, let cool, and pop into the freezer. We love it on toasted English muffins.

I don’t have my original recipe, but a quick internet search gave me several versions. This one is the closest to what I remember mine being. The only change I made is to use strawberry jello – I don’t care for raspberries.

RHUBARB BLUEBERRY JAM
Printed from COOKS.COM
--------------------------------------------------------------------------------
5 c. rhubarb, cut fine
1 c. water
5 c. sugar
1 c. blueberry pie filling
2 (3 oz.) pkgs. raspberry gelatin (I used strawberry)
Cook rhubarb in water until tender; add sugar and cook five more minutes.
Add pie filling and cook eight minutes, stirring constantly. Remove from
heat and stir gelatin in until completely dissolved. Pour into jars and
seal. Store in refrigerator or freezer.

**I used about med-high heat. The jars will cool on the counter for a few hours, then go into the frig, then the freezer. BE CAREFUL when you freeze glass. Freezing makes glass brittle and it should be handled with care.

Enjoy!

Sunday, May 30, 2010

Chicken Kebab Salad

One afternoon in March I was watching Food Network while rocking the baby to sleep, and Tyler Florence was making these yummy-looking chicken kebabs.  I’ve had this recipe on my menu plan a couple of times, but couldn’t buy the fresh bay leaves until we were in Lincoln a few weeks ago. Then I needed a good grilling day when the wind wasn’t blowing 300 mph. Finally it happened last week. These were a snap to put together. Here’s the recipe as I took it from the Food Network web site, then I have some notes on what I actually did after that:

Chicken Kebab Salad
Recipe courtesy Tyler Florence, 2007
  Prep Time: 15 min
  Inactive Prep Time: 30 min
  Cook Time: 35 min
  Level: Easy
  Serves: 4 servings
Ingredients
For the kebabs:
  a.. 8 links sweet Italian pork sausage
  b.. 1 crusty baguette
  c.. 2 to 3 medium, boneless, skinless chicken breasts
  d.. 12 fresh bay leaves
  e.. 1/2 cup extra-virgin olive oil
  f.. 2 lemons
  g.. Kosher salt and freshly ground black pepper
For the salad and dressing:
  a.. 2 anchovies
  b.. 2 cloves garlic
  c.. 1/2 lemon, juiced
  d.. 2 egg yolks*
  e.. 1/4 cup grated Parmigiano-Reggiano, plus shavings for garnish
  f.. 1 cup extra-virgin olive oil
  g.. 2 tablespoons water
  h.. Kosher salt and freshly ground black pepper
  i.. 2 heads romaine lettuce, chopped
  j.. Flat-leaf parsley, for garnish
  k.. 2 lemons, cut into wedges, for garnish
Directions
Special equipment: 4 large foot-long skewers, metal or thick bamboo work05-30-10 038
best, soaked in water for half an hour if using bamboo or wood.
Preheat grill to medium-high heat.
For the kebabs:
Slice chicken thinly, cut the baguette into 1/2-inch rounds, and cut the
sausage links up into chunks, alternating cuts at 45 degree angles for nice
triangular shapes.
Now prepare the kebabs. Take the skewers 1 at a time and begin threading the components alternately. Start with a piece of bread, then chicken, bay leaf, sausage, and bread; repeat this 3 times to fill the skewers, ending with bread.
Lay the prepared kebabs out on your board and drizzle liberally with
extra-virgin olive oil. Squeeze the lemon juice all over and season well
with salt and freshly ground black pepper. Place the prepared kebabs onto
preheated grill and cook for about 7 to 10 minutes per side, or until cooked
through.
05-30-10 046 While kebabs are roasting you can prepare the salad. In a blender combine
the anchovies, garlic, lemon juice, egg yolks and grated Parmesan. Pulse a
couple of times to combine, then add the water and blend again. With the
motor running, gradually pour the oil through the feed tube and continue to
blend until emulsified. Season, to taste, with salt and some freshly ground
black pepper.
In a large mixing bowl add the chopped romaine. When the kebabs are done, remove from the oven and slide the kebab components off the skewers directly into the bowl. Add some dressing and gently toss to combine.05-30-10 049
To plate, garnish with parsley leaves, shaved Parmesan and fresh lemon
wedges.

**My notes: For the salad portion of this recipe, I cut up a couple of heads of Romaine, then just used Cardini’s Caesar Salad dressing.

For the kebabs, I added half mushrooms to the skewers after each sausage piece. I think my grill was a little too hot since some of the bread was burned. I did cook them for 7 minutes on each side, though, to make sure the chicken was fully cooked.

This was a light but flavorful supper. I think it could be made without the fresh bay leaves and still taste great. The bread chunks made for large croutons.

This is one I’ll make again when the weather is hot and no one wants a heavy meal.

signature

Sunday, May 16, 2010

Coconut Pecan Frosting

Today is Greg’s birthday and he always likes to have German chocolate cake with caramel pecan frosting as his birthday cake. Jess baked the cake this afternoon (from a mix) and I whipped up some homemade frosting tonight after supper. Many years ago my friend Cindy gave me her recipe for homemade coconut pecan frosting and I’ve used it since. The tub frosting is thicker, but the homemade tastes so much better.

Coconut Pecan Frosting

1 C evaporated milk*

1 C sugar

3 egg yolks

1/2 (1 stick) butter

1 tsp vanilla

Combine and cook until thickened (about 12 minutes).**

coconut pecan frosting (1)

1 1/3 C coconut

1 C chopped pecans

coconut pecan frosting (2)

Beat until thick enough to spread.

coconut pecan frosting (3)

*I had no cans of evaporated milk in my cupboard, but a quick Google search had me mixing up 2/3 C dry milk w/ 3/4 C water to equal 1 C evaporated milk.

**It’s thicker than it started, but not frosting thickness. After 12 minutes it wasn’t getting any thicker, so I went ahead and took it off the heat to add the coconut and pecans. I let that cool a bit before beating.

coconut pecan frosting (4)

It was still a little thin when I poured it over the cake, but I’m letting it sit awhile to cool a little more. It should thicken some more as it cools.

I love the way it seeps down to cover the sides of the cake.

coconut pecan frosting

It’s rich and sweet and oh-so-easy to make from scratch. You’ll never want to buy your frosting again.

Wednesday, March 17, 2010

Stuffed Pork Loin

Greg’s been looking at barbecue web sites lately and they’ve inspired him to try something new. On Sunday afternoon, he whipped up this stuffed loin of pork and cooked it on the rotisserie on the grill.

3-17-10 018

He sliced the loin in kind of a circle pattern so it laid open flat, then layered it with prepared Stovetop stuffing (I know, but he loves it…). He didn’t tell me he was doing it, so I didn’t get a photo of that step, but I did see he was tying it up and putting the rotisserie hardware on, so I grabbed the camera. Here it is, ready to cook. Stuffed, then simply seasoned with salt, pepper, garlic powder, and some paprika. According to Greg, the paprika gives the meat a nice color.

Here it is, sliced up and ready to feast on:

3-17-10 026

It was very tender and flavorful, and the stuffing added some moistness. I imagine we’ll be experimenting with different stuffing ingredients – he’s talking bleu cheese… I’d love to add some dried cranberries to the Stovetop (again, I know, but it was pretty good).

Any suggestions you want him to try?

signature

Saturday, March 13, 2010

Some Sunshine on a Cloudy Day

Grace and I made these together this morning. It was our “project” for the day and she did a great job! Photos of her cupcakes will be posted on my other blog, but here’s the recipe from Family Fun. It was a bit more tedious than I expected, so next time we thought we’d use a pastry bag for each color rather than try to spoon it all out. We’ll see…  They’re really very pretty when you break them in half.

Taste a Rainbow

From FamilyFun Magazine

Taste a Rainbow

Ingredients
  • White cake mix (we used an 18-1/4-ounce box)
  • Food coloring (red, blue, green, and yellow)
  • Baking cups
  • Whipped cream (optional)
Instructions
  1. Prepare your favorite white cake mix, then divide the batter evenly among six small bowls. Following the chart below, dye each bowl of batter a rainbow color.

    RAINBOW COLOR
    DROPS OF FOOD COLORING

    Purple
    9 red and 6 blue drops

    Blue
    12 drops

    Green
    12 drops

    Yellow
    12 drops

    Orange
    12 yellow and 4 red drops

    Red
    18 drops

  2. Line 16 muffin pan wells with baking cups. Evenly distribute the purple batter among the cups, then the blue, and so on, following the order shown. As you go, gently spread each layer of batter with the back of a spoon to cover the color underneath.

  3. Bake the cupcakes according to your recipe directions. Before serving, remove the paper wrapping, and if you like, top each cupcake with a whipped-cream cloud.

Saturday, March 6, 2010

Mmmm…

I made turkey pot pie for supper yesterday, prepping the filling in the morning, so all I had to do at suppertime was throw on the biscuit topping and pop it in the oven. That left me some extra time to make a lil’ somethin’ for dessert. It needed to be simple, quick, use ingredients I already had in the house, and yes, it had to be chocolate.

Since I already had my Joy of Cooking cookbook out, I took a quick glance through the recipe index and decided on chocolate pudding. Only a few ingredients and it whipped up in a heartbeat. Well, several heartbeats, but it was fast.

Old-Fashioned Chocolate Pudding

1 3/4 C milk (I used skim)

1/2 C sugar

2 oz. unsweetened chocolate, chopped

1/8 tsp. salt

Combine in a heavy saucepan. Heat over med-low heat, stirring occasionally, until the chocolate is melted.

3 Tbs. cornstarch

1/4 C milk

Mix together until smooth. Stir slowly into hot milk mixture. Stirring constantly, heat over medium heat until mixture just comes to a simmer. Reduce heat to low, stirring briskly, bring to a simmer and continue to cook for 1 minute. Remove from the heat and stir in 1 tsp. vanilla.

Pour into 5 or 6 ounce serving dishes. Cover with plastic wrap pressed directly onto the surface of the pudding. Chill for at least 2 hours. (Serves 4)

Have you ever had homemade pudding? Try this and you’ll never purchase that instant boxed stuff ever again! Enjoy!

(Oh, sorry, no photo. You think there’s anything left to take a picture of?)

signature

Wednesday, March 3, 2010

Coconut Crème Brulee

When we had our turkey dinner for lunch on Sunday, Greg was responsible for dessert. He thumbed through the current issue of Bon Appetit and found this recipe for coconut crème brulee.

Crème Brulee is really easy to make, plus there’s the fun of torching the sugar on top before eating. This particular dish had a very subtle coconut flavor, and was rich and smooth.

creme brulee

Coconut Crème Brulee  (Bon Appetit, March 2010)

1 C sweetened flaked coconut, divided

3/4 C + 8 Tbs. sugar

7 large egg yolks

1 3/4 C heavy whipping cream

1 14 oz. can unsweetened coconut milk

2 Tbs. Malibu rum or other coconut flavored rum (we got one of those tiny bottles)

1/2 tsp. salt

Preheat oven to 350. Spread 1/2 C flaked coconut on rimmed baking sheet. Bake until light golden, stirring once, 10-12 minutes.

Whisk 3/4 C sugar and egg yolks in medium bowl to blend. Mix cream, coconut milk, toasted coconut, and remaining 1/2 C sweetened flaked coconut in heavy large saucepan. Bring just to simmer over med-hi heat, whisking occasionally. Gradually whisk hot cream mixture into yolk mixture. Stir in rum and 1/2 tsp. salt. Strain custard through a fine strainer into medium pitcher, pressing on solids. Divide among eight 2/3-3/4-cup ramekins or custard cups.

Place ramekins in large roasting pan. Fill pan with enough hot water to come halfway up sides of ramekins. Bake custards until edges are set, but centers move slightly when dishes are gently shaken, 45-50 minutes. Remove custards from water. Chill custards uncovered until cold, then cover and chill overnight.

Sprinkle 1 tsp. sugar over each custard. Using kitchen torch, heat sugar until melted and deep amber. (Alternatively, preheat broiler. Place ramekins on rimmed baking sheet and broil until sugar melts and turns deep amber, 1-2 minutes.) Chill until sugar hardens, about 15 minutes.

You can try to eat this quietly, but I bet there will be lots of “mmmm”s. :o)

signature

Tuesday, March 2, 2010

Chile Verde Meatballs

This recipe has been in my computer file for a couple of weeks, but I didn’t make note of where I found it, so I can’t share the source with you. It’s also been on my menu plan for a couple of weeks, but I finally was able to make it for supper, so I can share that with you!

This is so easy to whip up, and very tasty without being too spicy. I made my own meatballs (remember, I keep some in the freezer) instead of using purchased frozen ones. Even if you don’t have any meatballs in your freezer, they don’t take long to make (20 minutes in a 350 degree oven), so you, too, can avoid the icky, rubbery grocery store variety.

These were served with rice, refried beans, and warm flour tortillas. My original plan was to have black beans, but it turns out we didn’t have any in the cupboard. (Back to the freezer again for the homemade refried beans. Yea!)

This photo is Jessi’s plate, since I had gobbled down half of my meal before thinking of taking a picture. She really likes sour cream, so I thought I’d make note of that – I didn’t use quite that much. :o) The sour cream really does finish off the flavor of this dish, though, so make sure you have some for garnish.

chile verde meatballs

Chile Verde Meatballs
SERVES 4 -6
1 large fresh onion, minced
2 cloves minced garlic
1 (16 ounce) jar salsa Verde
1/2 cup chicken broth
1 1/2 lbs frozen meatballs
1/2 teaspoon ground cumin
1/2 cup sour cream, for garnish
Directions
- Into a large, heavy pot, add the onion, garlic, salsa Verde, broth, and the meatballs.
- Simmer on low for 30 minutes, stirring occasionally; add the ground cumin
and simmer for 15 minutes more.
- Serve with sour cream for garnish, along with rice and beans and
tortillas.
**Note: you can also make this in your crockpot on low for 4 hours, adding
in the cumin in the last 30 minutes.

signature

Friday, February 26, 2010

Tuna Delicious

Another new recipe, another with no photo. We ate it up too quickly!

Again I used the homemade mushroom soup. Again, it was a bit too runny. Now that I’ve used one entire bag of soup, I’ve decided I’ll thicken it with cornstarch when I use it in a recipe, for a creamier texture.

I had a few problems with the rest of this recipe, in that I had very little sour cream. I blame that on Jessi and Greg using it up the night before as dipping sauce for taquitos. Not on my lack of checking what I needed for the recipe before it was time to cook…

Since I fell woefully short on sour cream (and I did call Nanny to see if I could borrow some, but she was out, too), I added about 1/2 cup of shredded cheese at the end. That was fine, but I think the flavor would have been much better with the 8 ounces of sour cream. I’ll make this again with the correct amount of ingredients.

Even with the changes, Greg and Jessi gobbled this up. I don’t make tuna casserole very often (another instance of “I ate it so often when I was a kid, I don’t want it now”), but they really love it. When I do make it, I always use Kluski noodles. They’re firmer and we like the texture better in this dish. kluski

This is another Allrecipes.com recipe. (When I was menu planning for this week, I went to Allrecipes and typed in mushroom soup under ingredients. I didn’t have any potatoes, so I typed that under the “don’t want” category, then clicked on ‘search’.)

http://allrecipes.com/Recipe/Tuna-Delicious/Detail.aspx
      Tuna Delicious
            Prep Time: 20 Minutes
            Cook Time: 15 Minutes   Ready In: 35 Minutes
            Servings: 4
Ingredients:
      1 (8 ounce) package egg noodles
      1 tablespoon vegetable oil
      1 onion, chopped

1 (6 ounce) can tuna, drained (I used a 12 oz. can)

      1 (10.75 ounce) can condensed cream
      of mushroom soup
      1 (8 ounce) container sour cream
Directions:
      1. Bring a large pot of lightly salted water to a boil. Add egg
noodles and cook for 8 to 10 minutes or until al dente; drain.
      2. In a large skillet over medium heat, fry onion in oil until
browned. Mix in tuna and mushroom soup. Stir in sour cream and heat through.
Mix together the cooked egg noodles and sauce and serve.

I served this casserole with steamed frozen peas.

signature

Thursday, February 25, 2010

Creamy Mustard Pork Chops

"Seasoned, browned pork chops simmer in a creamy mustard-laced mushroom sauce."

This is one of the new recipes I’m trying this week. I used some of the homemade cream of mushroom soup, which tastes pretty good, but isn’t very appetizing-looking (so I didn’t take a photo). It’s also much runnier than canned soup, so it needs some extra simmering time to reduce and thicken. Otherwise, the sauce is quite flavorful.

This recipe is from Allrecipes.com:

http://allrecipes.com/Recipe/Creamy-Mustard-Pork-Chops/Detail.aspx


      Creamy Mustard Pork Chops
      Submitted By: Campbell's Kitchen
      Cook Time: 25 Minutes Ready In: 25 Minutes
      Servings: 4
Ingredients:
      4 boneless pork chops, 3/4-inch thick
      1 1/2 teaspoons lemon pepper seasoning
      1 tablespoon butter or margarine
      1 (10.75 ounce) can Campbell's®
      Condensed Cream of Mushroom Soup or Campbell's® Condensed 98% Fat Free
      Cream of Mushroom Soup
      1/2 cup milk
      1 tablespoon Dijon-style mustard
      1 tablespoon chopped fresh parsley
Directions:
      1. Sprinkle chops with lemon pepper seasoning. Heat butter in skillet.
Cook chops 10 minutes or until browned.
      2. Add soup, milk and mustard. Heat to a boil. Cover and cook over low
heat 10 minutes or until chops are done. Sprinkle with parsley.

I served these with brown & wild rice and green beans.

signature

Wednesday, February 24, 2010

Freezing Soupy Stuff

A couple of weeks ago I made some homemade cream of mushroom soup and put it in the freezer. My container of choice was zipper bags. With bags, the food freezes flat, so it doesn’t take up as much room, and is easily stacked in the freezer.

One of the handy tips I share with people when they attend my freezer cooking class is how to fill those zipper bags with “soupy stuff” without making a huge mess.

1.  You need freezer grade zipper bags and a deep container.

02-09-10 028

2.  Tuck the open bag down into the container.

02-09-10 031

3. Choose a container that allows the top of the zipper bag to be folded down over the top edge. If the opening is too wide, the bag won’t fit. Fold the top of the bag over the edge of the container by about 1/2”.

02-09-10 033

Fill the bag using a ladle or small measuring cup. Stop filling at least 1/2” from the container top.

4. Pull the top of the bag up and seal the zipper. Then pull the bag out of the container. Remove the air from the bags (I open the bag a little bit and carefully push the air out.) Seal the zipper again.

02-09-10 035

5. The bags should be dated and labeled before filling, but if you forgot (ahem), use a Sharpie now. You can see how the bags are lying flat on a cookie sheet. This is how I transport them to the freezer in the garage, and I leave them on the cookie sheet until they are frozen. There are wire racks in the freezer and the contents of the bag would freeze around the wires if they weren’t on a solid surface. Don’t ask how I know that…

02-09-10 037

Sometimes with soupy or liquid contents, I double bag. Just slide the full bag into another freezer bag and seal. You can remove the double bag after freezing if you like. This is a great precaution to take in case the zipper fails on the first bag. Again, let’s not ask…

This method can also be used for less soupy dishes like casseroles or vegetable dishes. Again, make sure to squeeze out the air – frozen air takes up freezer space and compromises the quality of your yummy food!

signature

Monday, February 15, 2010

Menu Monday

I’m actually going to plan this week’s menu as I type…

Monday – Salmon, green pepper couscous (recipe to follow), green salad

Tuesday – Oatmeal pancakes, scrambled eggs, link sausages, fresh fruit cup

Wednesday – Fagioli soup, homemade bread

Thursday – Baked creamy chicken taquitos, black beans w/ cilantro, green salad

Friday – Homemade pizza, green salad

Salmon with couscous is one of my favorite meals. When I can’t grill it, I cook the salmon in the grill pan on the stove. Just dab with a little olive oil and sprinkle with a tiny bit of salt and pepper, then cook 3 to 4 minutes on each side. (I like my salmon cooked all the way through, thank you.)

Usually I just make plain couscous, using chicken broth instead of water. Tonight I wanted to add a little something to it, change up the flavor a bit, and a quick Google search brought me to this:

Green Pepper Couscous
Ingredients:
1 Tbsp butter or margarine
1/2 medium onion, sliced (about 1 cup)
2 medium green bell peppers, diced (about 2 cups)
4 medium cloves garlic, crushed through a press
1-1/2 cups water
1 cup precooked couscous
Salt and freshly ground black pepper to taste
Instructions:
Melt butter in a nonstick saucepan and add onion. Sauté gently for about 10
minutes, or until onion is golden. Add green peppers and garlic and sauté
for another 5 minutes. Add water and bring to a boil. Stir in couscous,
cover, and remove from the heat. Let stand for 5 minutes. Fluff with a fork
and add salt and pepper to taste.

Note: I only used half a bell pepper and two cloves of garlic, because Greg would like that better. Didn’t get a photo, but it was a pretty supper plate!

signature

Sunday, February 14, 2010

Surf, Turf, & Love

We celebrate St. Valentine’s Day, but it’s usually understated and simple. Some flowers and a candlelit steak supper. This year was only a little different.

Yesterday we came across a “surf & turf” special at a big grocery store in Lincoln. This included two 5-ounce filet mignon steaks, and two 5-ounce lobster tails for one very reasonable price. I looked at Greg and said, “I haven’t bought you anything for Valentine’s Day yet, have you bought me anything?” He shook his head “no”, and I said, “So we get this and it’s ‘Happy Valentine’s Day’ to us? He smiled and nodded. 

02-01410 021We’ve eaten lobster many times, but only cooked it once, when Nick was a baby and there was a deal on them at a local grocery. That’s like, twenty-five years ago. Hmmmm…


So we thought we’d grill both the surf and the turf, but awoke this morning to a snowstorm, the wind howling, and freezing cold temperatures. Ack. No grilling outside today. We do have a cast iron grill pan, though, and that worked great for the filets. After doing some research online, we decided to boil the lobster tails. Instructions were for boiling salted water, and cooking for one minute per ounce of weight. Easy enough.

02-01410 025

Greg grilled the steaks, then while they rested, he boiled the lobsters.


Five ounce tail02-01410 029s, so they cooked for five minutes…


Sorry this last photo is a little blurry. By then, I’d had02-01410 030

a little bit of this:

02-01410 026

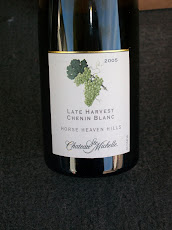
(Columbia-Crest is one of the wineries we visited when we went to Seattle. This merlot-cabernet blend is perfect with beef.)

It was a lovely meal with twice-baked potatoes, garlic bread, and a fresh Caesar salad. I was too busy feasting to get a photo, though. :o)

I love when we work together and then enjoy the end results together. Happy Valentine’s Day!

signature

Tuesday, February 9, 2010

Homemade Cream of Mushroom Soup

We all know that homemade is fresher and more nutritious than processed, and that’s definitely true for canned “cream of …” soups.  The other day I came across a recipe for cream of mushroom soup made in the Crockpot, and stored in the freezer, from A Year of Slow Cooking. This is right up my alley – and I’ll recommend this blog at my next Freezer Cooking class in April.

So yesterday I got the baby down for a nap, and headed to the kitchen. It just takes a few minutes to wipe off two pounds of mushrooms – looks like alot, huh? They filled up the Crockpot, too, after being cut into quarters. Throw in the spices and squeeze in the lemon juice, then add the broth and water, and walk away for eight hours. Can’t get too much easier, I think.

Here’s the recipe as it’s printed on the original blog, with my comments following:

Cream of Mushroom Soup (Crockpot)

“This recipe is for a LARGE Crockpot. Don't attempt these proportions in anything smaller than a 5qt.

--2 lbs mushrooms 02-09-10 019

--2 cups water

--2 cans (4 cups) vegetable broth

--1 qt of milk (to add later)

--juice of 1 lemon

--1/2 t salt

--1/2 t pepper

--1 T dried minced onion

--2 T Italian seasoning

The Directions:

Wash your mushrooms well and cut them into fourths. Put into your stoneware and add the spices and lemon juice. Pour in the vegetable broth and water. Cover and cook on low for 8 hours.

CAREFULLY use an immersion hand blender and blend until soupy. If you don't have an immersion hand blender, very, very carefully blend in batches in a regular blender.

Stir in an entire quart of milk. I used fat free cow's milk. You can use any percentage you'd like; even cream.02-09-10 025

Let cool on the counter for quite a few hours, then pour into freezer bags to store or plastic containers. I used 2 cups per bag--which is 16 fluid ounces. A can of cream-of-soup is 10 ounces.”

This smelled amazing while it was cooking! After I blended the mushrooms, the crock went into the frig overnight. This morning I added what was left of a pint of fat-free half & half and a little bit of heavy cream, then added skim milk to make the 4 cups. It’s bagged and in the freezer, and I think will add so much flavor to any recipe that calls for canned cream of mushroom soup. Yes, it’s runnier than the canned stuff, but could easily be thickened if desired.

I’m going to leave it in the freezer until next week, then will use it in a recipe. If it’s awesome, like I suspect, I’m going to make another batch just so I have plenty on hand.

Enjoy!

signature